

Stay in the loop! Be sure to follow-me on Instagram and Facebook! You can also follow me on Pinterest to see what I’m inspired by and find inspiration of your own.
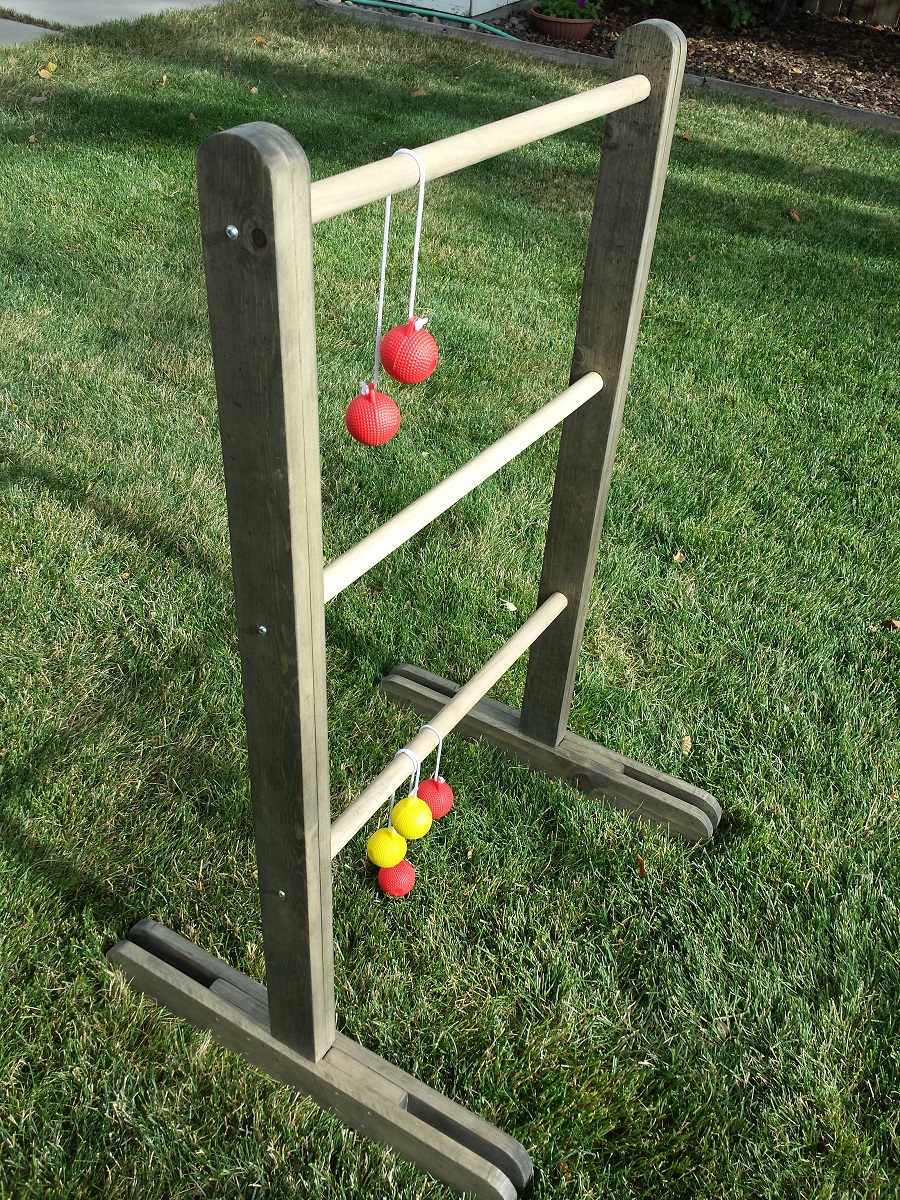
Happy Fourth of July!!! I’m not 100% on this, but I’m pretty sure that the very first thing our forefather’s did after signing the Declaration of Independence was go out to the nearest park, put up their ladder golf set, and got in some “wicked” games (yeah, that’s right. I went all Bostonian on you). There is no doubt that George Washington was a ladder golf expert, after all, it’s a well-known fact. Couldn’t lie, chopped down cherry trees and had a nasty bolo toss! Well, that’s what I like to believe anyway. Even if our forefather’s didn’t play ladder golf, there is no reason why you can’t, and if you’ve wanted a ladder golf set, but didn’t want to spend the money, fear not! These plans cost me less than $30.00 to build, including the set of bolos which were $9.00 themselves!

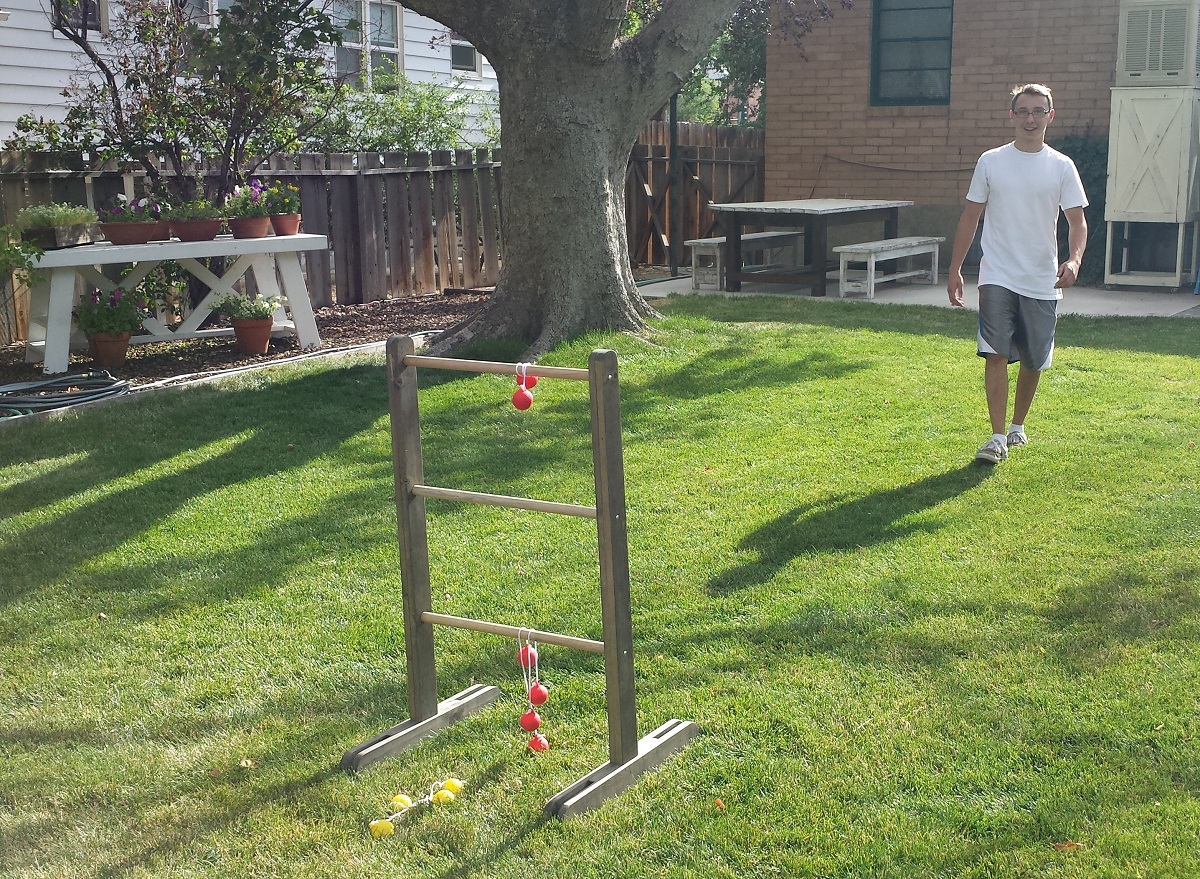
My son has been asking me to build a ladder golf set for a while. I looked around and found some cheap ones at about $20, but they seemed just that, cheap. I decided to look at some higher quality, wooden sets, but found the price around the $100+ dollar range. Yeah, not happening. So what is a person who’s hobby is building furniture out of wood to do? Yup, build it. I looked around online for some inspiration, and got a general sense of direction. I put pen to paper for a bit, came up with a few ideas, brought out the laptop, fired up sketch-up and created a 3-D model to make sure I truly liked what I had in mind. I did, and the next stop was the local lumber store. I was able to get this done in a few hours, and then had my son come out and put a beating on me.
The best part of this project is that it can be as simple or as complex as you’d like. If you want rounded edges, you can do that. If you want each rung painted a different color? Go ahead. If you have the tools and wherewithal, you can get as crazy as you’d like. If you have a small collection of tools, or nothing more than a power drill, have your lumber store cut the boards for you. Then all you have to do is assemble everything when you get home. Most of all, have fun and enjoy your Fourth of July!!!
THE PLANS:
Download the free PDF here.

Materials Needed:
- (3) 1x3x8
- (2) 1”x48” wooden dowels
- 2” finish nails
- 1” finish or brad nails
- 1 ¼” wood screws
- Wood glue
- Sandpaper
- Finishing supplies (stain, paint, etc.)
Tools Needed:
- Power Drill
- Miter saw
- Brad or finish nail gun & compressor (if needed)
- 1” spade bit or forstner bit
- Jig saw (optional- only needed if you want to round off some of the pieces)
- square
- measuring tape
- pencil
- safety gear (hearing protection, safety glasses, etc.)
Cut List
- (4) 1×3 @ 41” (Ladder sides)
- (4) 1×3 @ 22 ½” (bottom braces)
- (4) 1×3 @ 4” (bottom supports)
- (3) 1” dowel rods cut @ 24” (ladder rungs)
The Project:
Note: You’ll notice throughout the build at times the project is stained, and at others the wood is somehow magically unstained again. I’m not magic, I just stained the project outside of the order I have listed. You can paint or stain at any point, I just did it where it made the most sense for me as I was using two different stains for different parts.
STEP 1a: Cut the sides of the ladder
If you haven’t pre-cut, cut (4) ladder sides @ 41”. Be sure to make sure the boards will line up with each other fairly flush on the edges. Sometimes 1x3s will be slightly warped, so you need to check this prior to cutting. I went ahead and pre-cut everything. It was getting ready to rain and I wanted to have everything cut so that I could move to the garage when needed.

STEP 1b: Notch the bottom of the ladder sides.
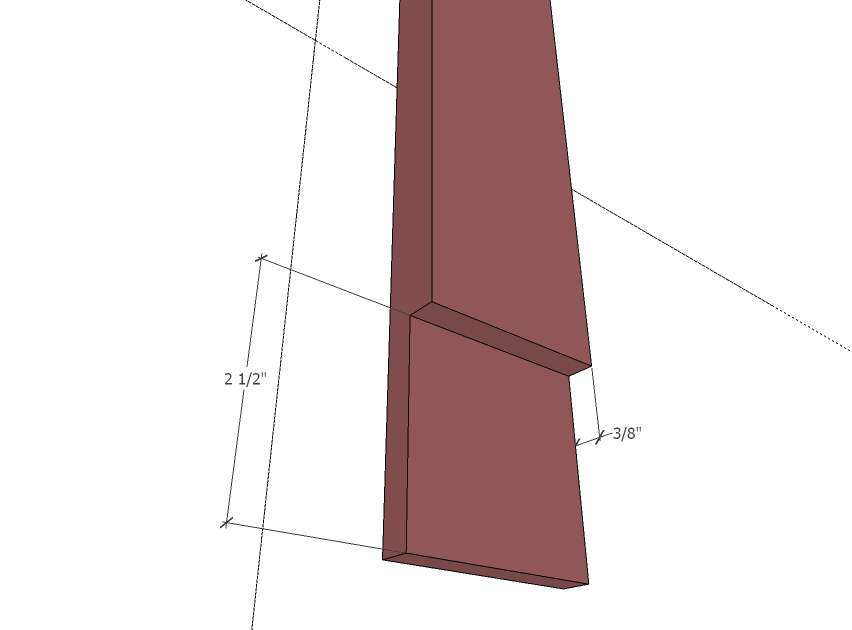
Create Half Lap Notch*: I’m not sure what else to call this, but you essentially want to notch out the 4 boards like you were going to create a half lap. The only difference is that we will not be using this as a joint, but to slide in to the bottom of the leg braces. To create the notch, measure 2 ½” from the bottom of the 41” board and strike a line across the board. Do this for each of the four ladder sides. At this point you want to remove 3/8” of material up to the 2 ½” line. You can do this several ways, with a router or router table, a miter saw if your saw has a way of creating a depth stop, a table saw. I’ve even seen people do this with a saw and chisel. After creating the notch sand smooth. Check the notch thickness by placing two notched boards back to back and compare the end thickness to that of another 1×3. As you’ll note below, I used my miter saw to do this. My saw has a depth stop, so I set the stop and made several shallow passes to remove the material. It is simple as long as you have your depth set correctly, so I recommend a test run with a scrap board first.


*NOTE: If you don’t have a way of creating a half lap joint, you can simply cut 2 of the four boards at 38 ½”. These 2 boards will be the outer brace for the ladder sides.
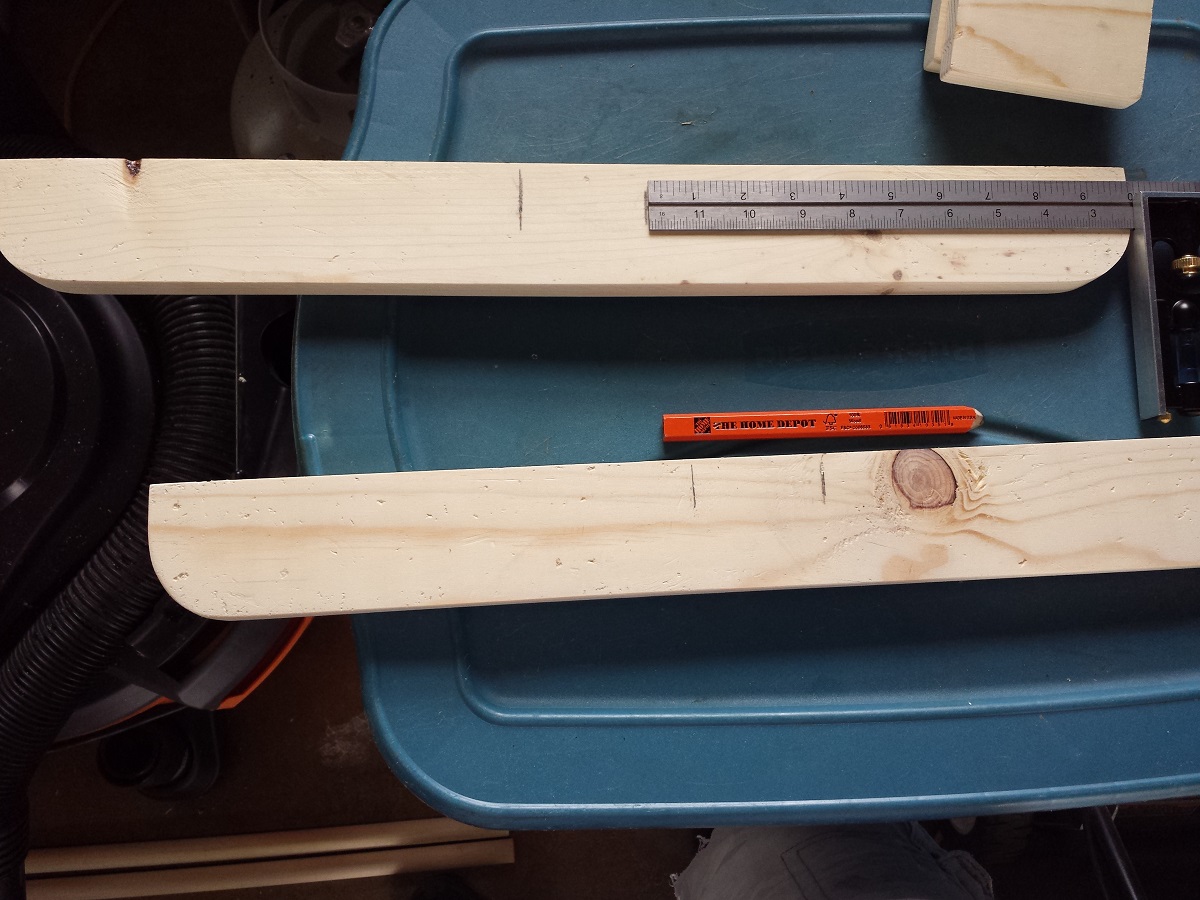
STEP 1c: Round the edges
If you want to round your edges, as I did, this is probably the best time to do it. Or not… honestly I’m not really sure it matters when you round your edges, it’s just what I did.
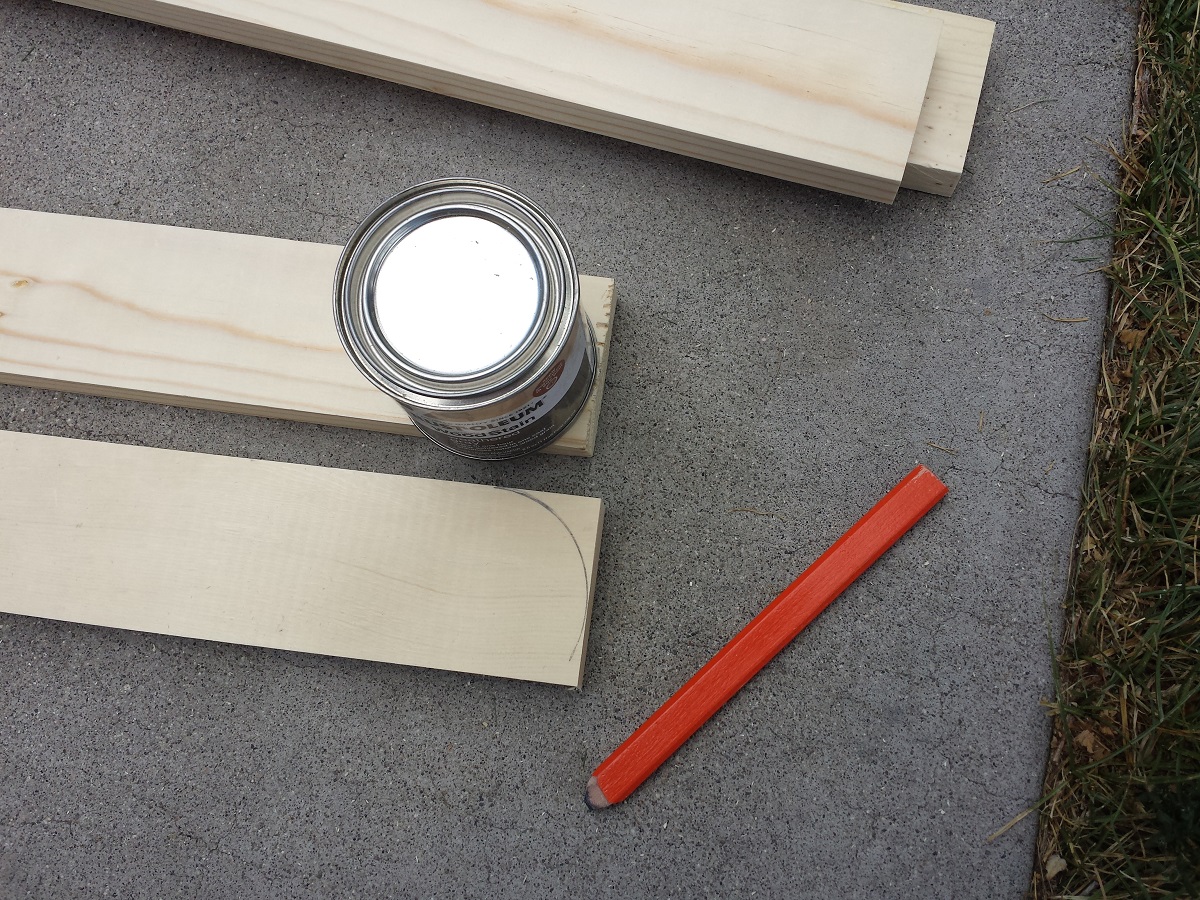
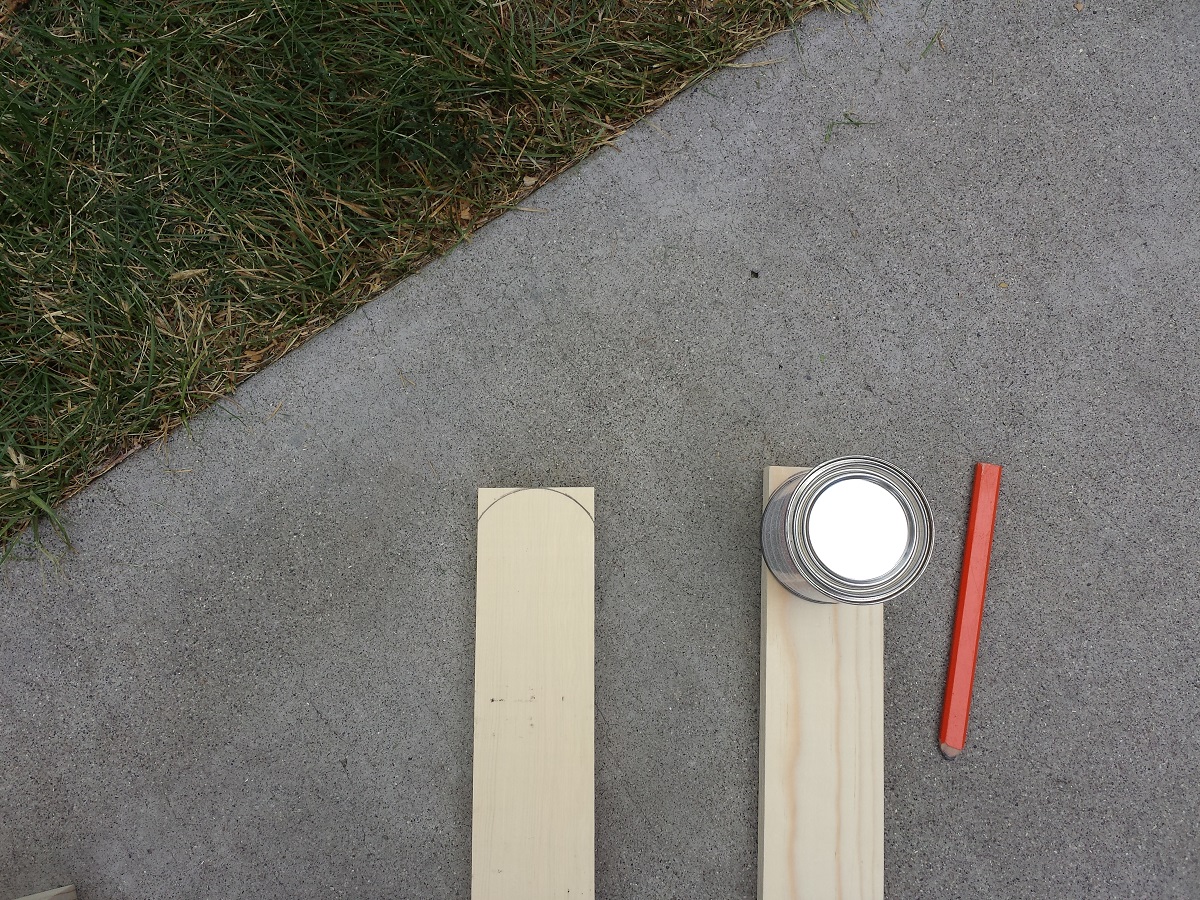


Using a small can of stain as a template, I traced a quarter circle on each edge of my legs, and a half circle at the top of my ladder sides (the notched side of the board is the bottom. Do not round these out). Using a jig-saw I cut the edges and then sanded them down to smooth them out.
STEP 2:

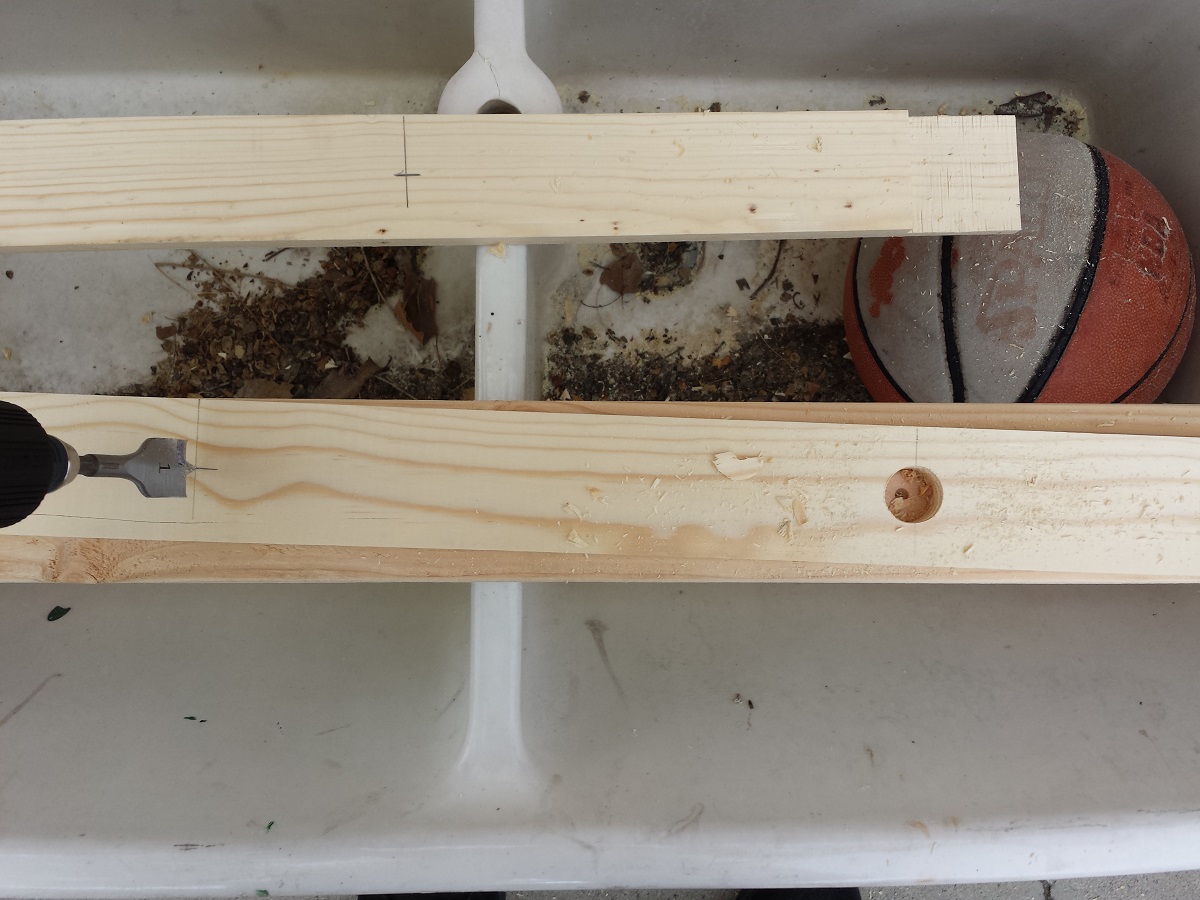
Select two of the ladder sides and mark every 13” starting from the bottom (notched part). Using a 1” spade bit or forstner bit, drill 3 holes on each board. This will be where the dowels go. I almost made this mistake while building this, so note that you do not drill the holes in all 4 side boards. Luckily I caught myself before making this mistake.
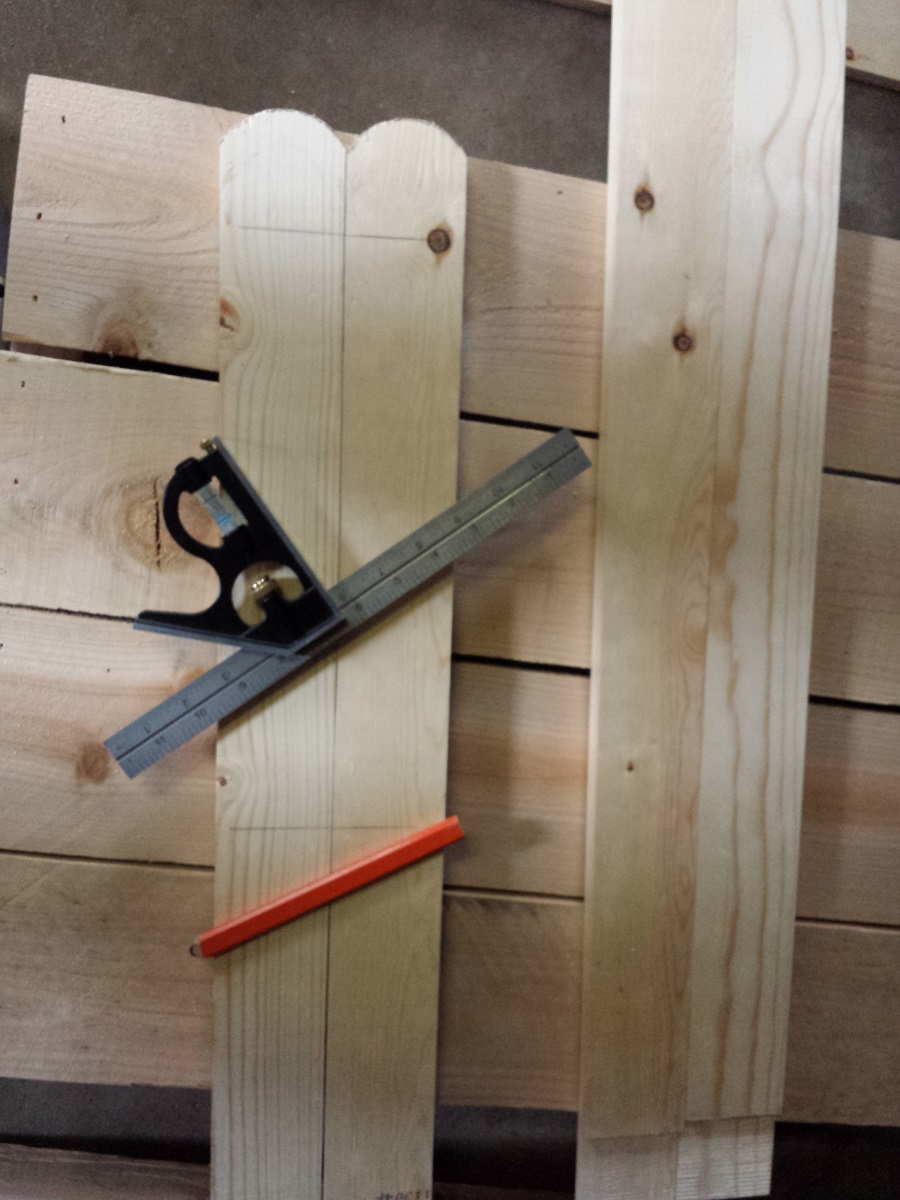
*NOTE: If you did not create a half-lap notch be sure to drill the holes in the 41” boards, not the shorter 38 ½” boards.
STEP 3:

Attach a pre-drilled (3 hole) ladder side to a notched side board. Be sure that the half-lap joints are facing away from each other. Use wood glue and 1” brad or finish nails to connect. Repeat for the other ladder side. If you didn’t notch the boards and are using 41″ and 38 1/2″ boards, make sure the tops of the boards are flush with each other, so that the leg drill with the holes can slide into the bottom legs.

Once the ladder sides have dried, drill a small hole in the center of each of the 1” holes. This will be needed later to attach to the dowels.

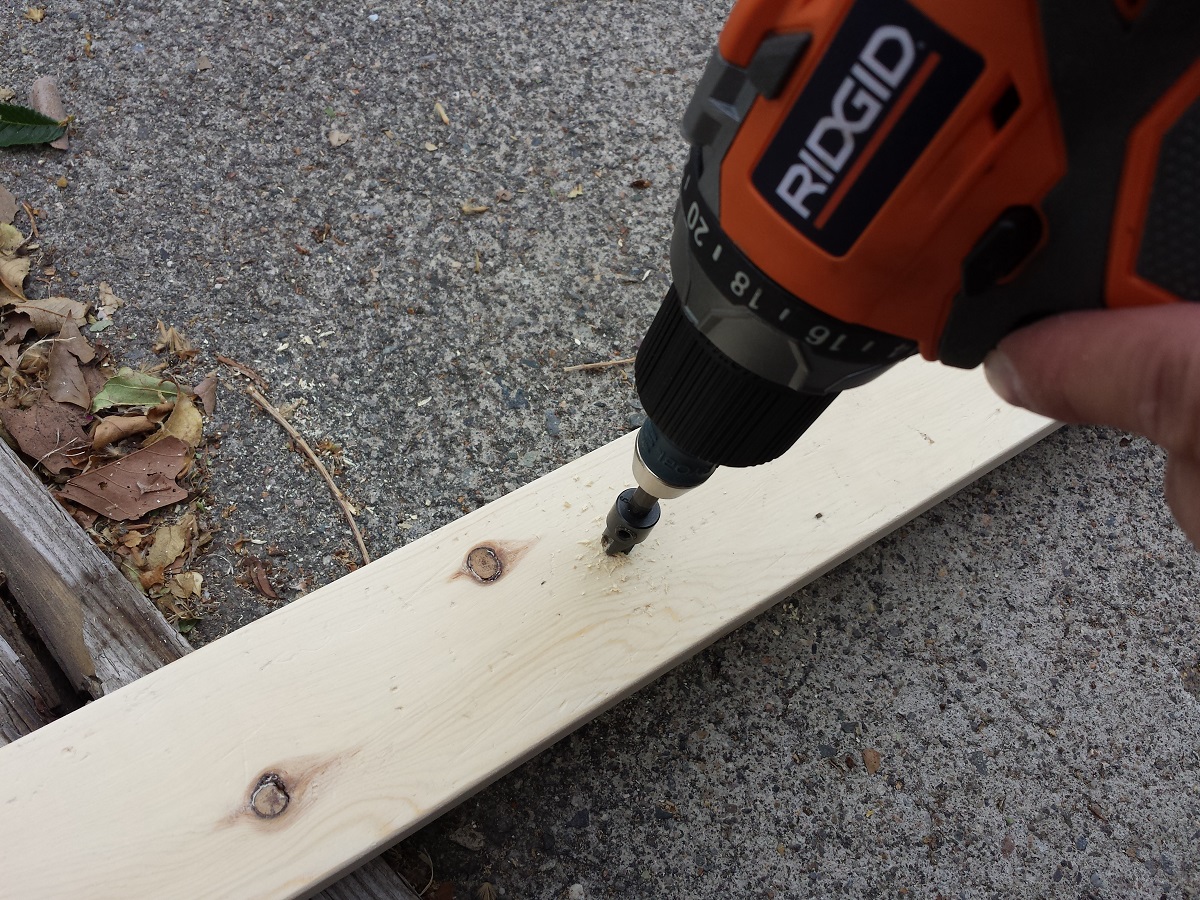
Above on the left you can see me drilling through the center. On the right I decided to flip the ladder side over and counter sink for my screws.
STEP 4:

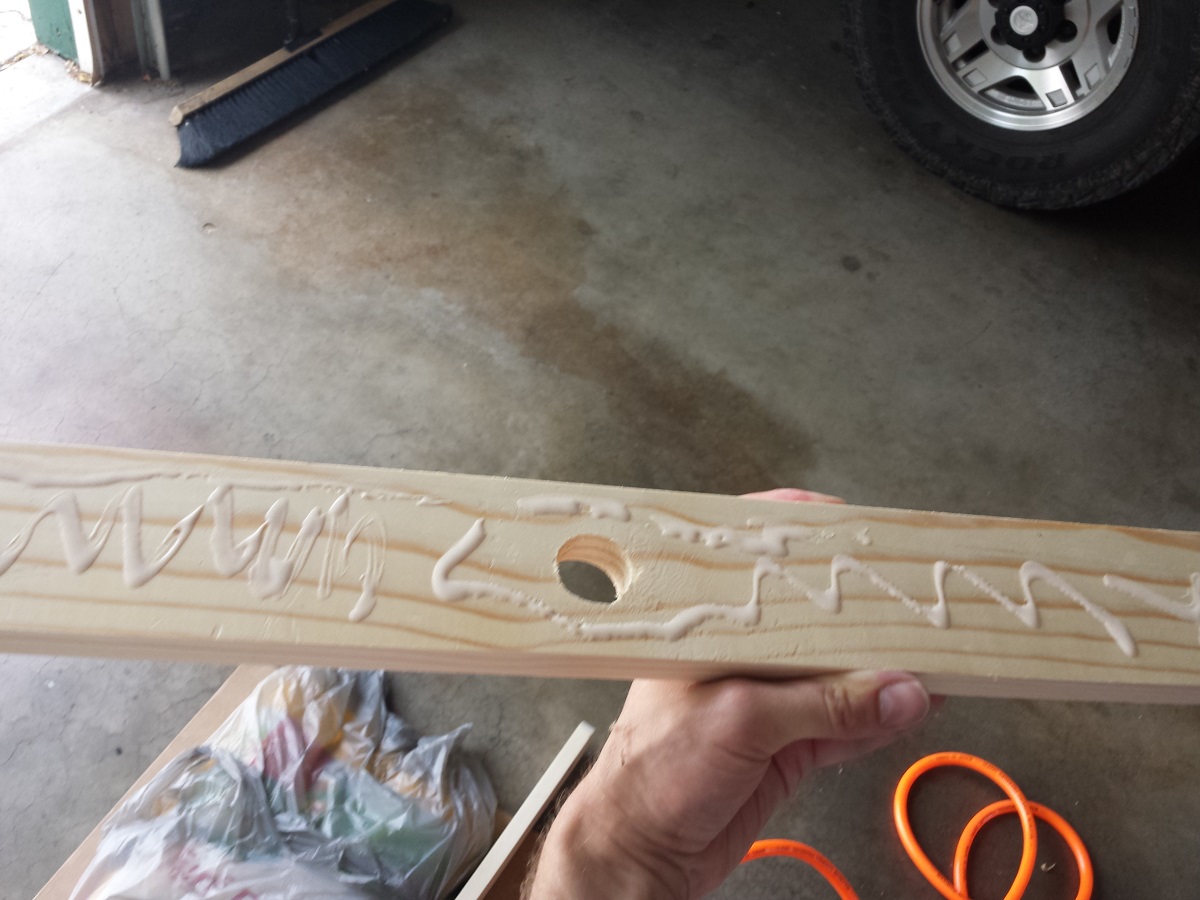
Using wood glue on the tip and ends of the dowels, attach the dowels to the ladder sides. Do one side first, and then the other. Be sure to check that the dowels are square with the sides. Using the hole you pre-drilled in the last step, pre-drill from the outside, in to the dowels. Add 1 ¼” wood screw from the outside of the ladder.


I feel it very important to check square several times on each rung, before, after pre-drilling and again after setting your screw. If they aren’t square to the sides, your ladder rungs will be lopsided and look pretty goofy.
For me, the plan was to counter sink the screw, fill it with stainable wood filler and hide it. I had this all planned, and then at the last minute, while screwing the dowels in, I decided that it’d be better to use my Kreg 1 1/4″ pocket hole screws with a washer head. Well, I didn’t decide to do this as much as I had to when I found I only had (2) wood screws left! Of all the stupid things…
STEP 5:
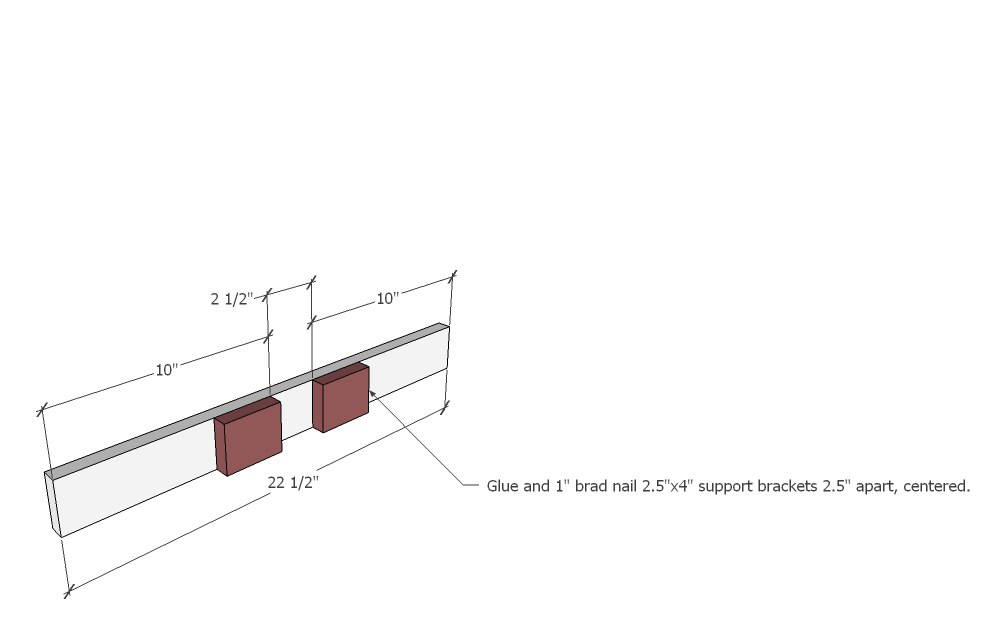
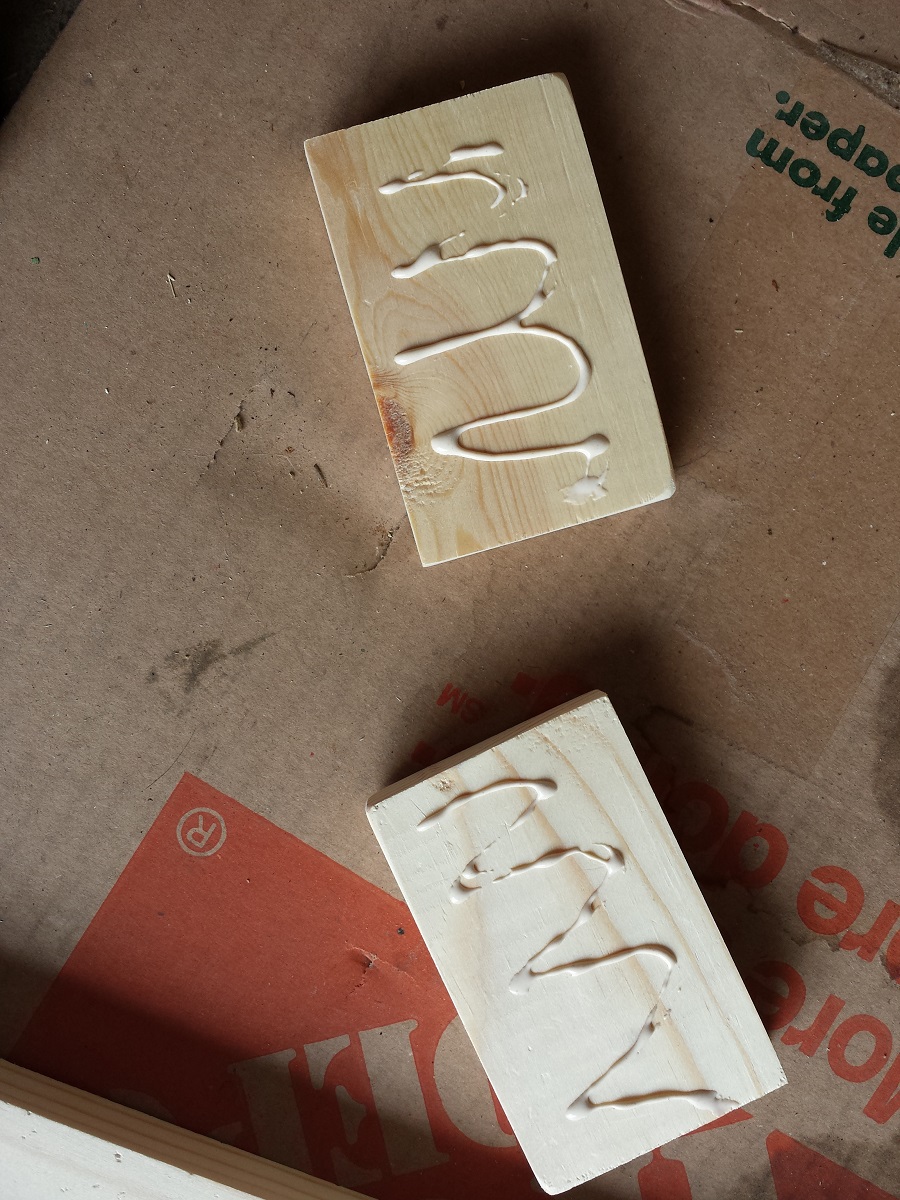
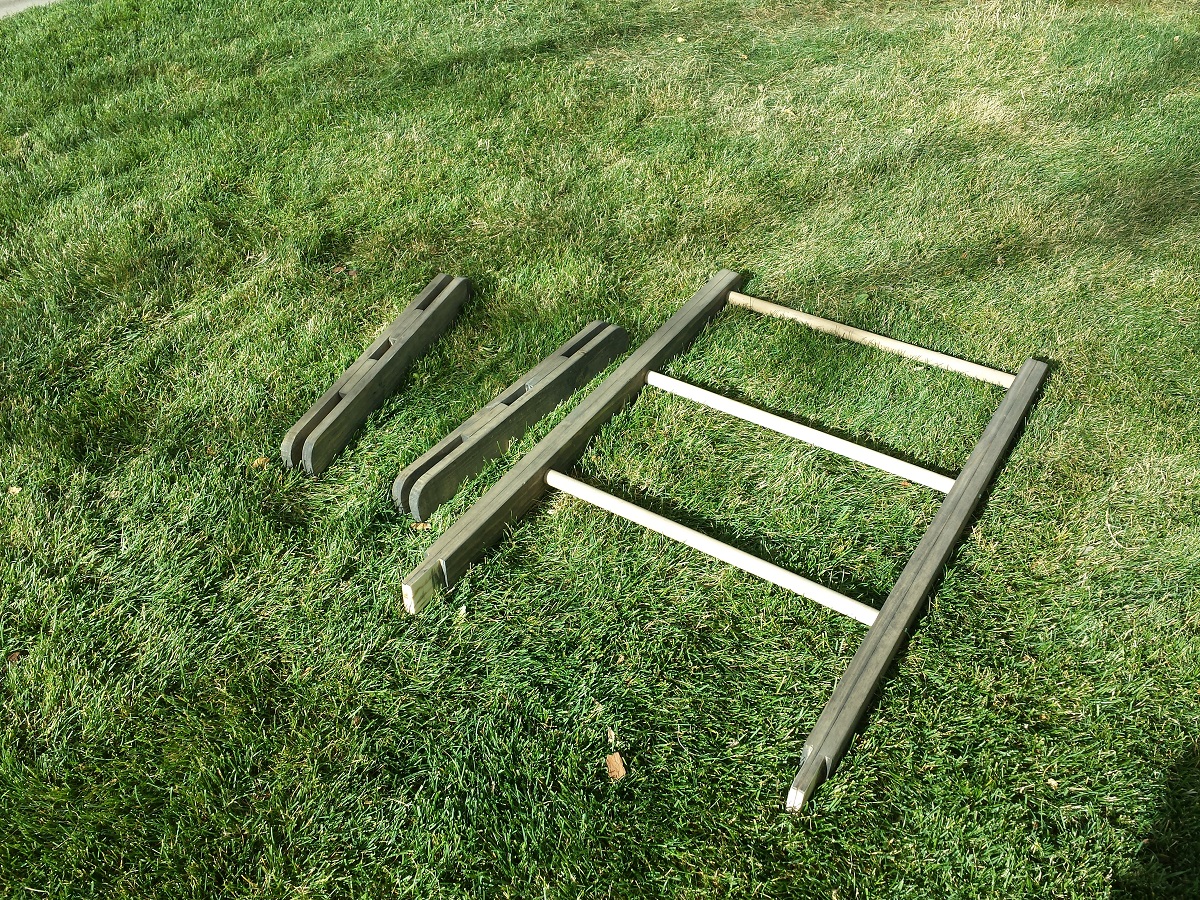
Now it’s time to create the legs. Cut (4) 2x3s @ 22 ½”. Also cut (4) 2x3s @ 4”. From the edge of the 22 ½” board, measure in 10” and mark. Repeat on opposite edge as well. Attach (2) of the 4” pieces at the lines marked. Secure with wood glue and 1” brad or finish nails. Be sure to make sure the spacing between the 4” boards is enough for a 2×3 to fit through.

STEP 6: 
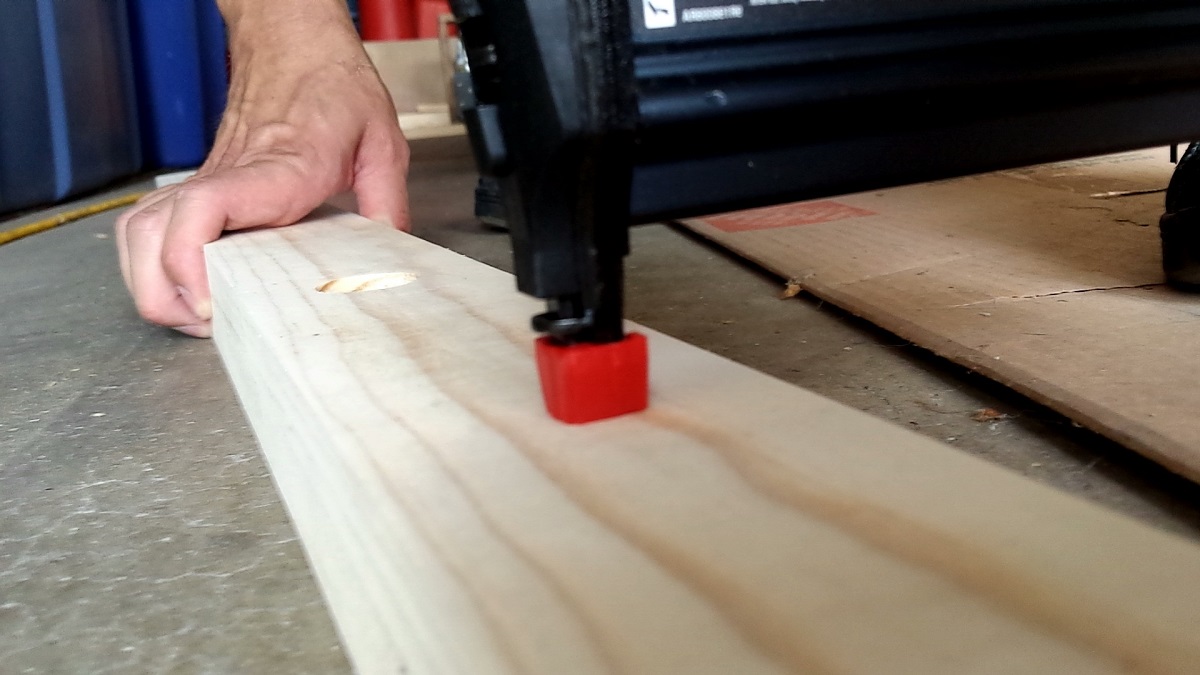
Add the outside leg brace. Secure with wood glue and 2” brad or finish nails. If you are planning on staining or painting your ladder, be sure to do it before you do this step.

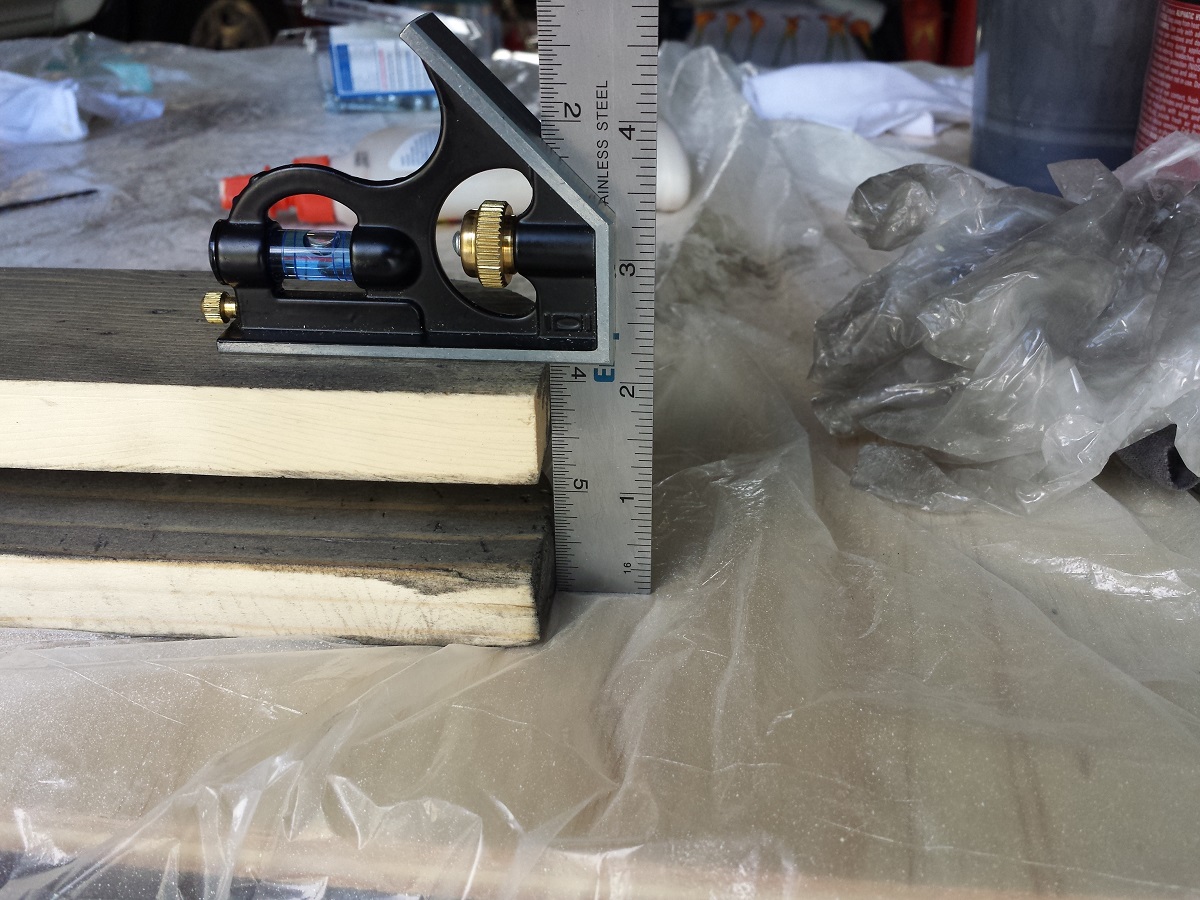

You’ll notice above right that I used my combination square to make sure the legs were flush with each other. I added (4) 2″ finish nails.
STEP 7:

Repeat the previous two steps for the other leg.
FINISHING STEPS:
All that’s left at this point is to fill the holes with wood filler (if desired) and sand the project. Be sure to vacuum the sawdust off the project, and wipe down with soft, damp cloth. Add stain, paint or both depending on your desired look.
