

Stay in the loop! Be sure to follow-me on Instagram and Facebook! You can also follow me on Pinterest to see what I’m inspired by and find inspiration of your own!
Yes, you read that right. This bench will cost approximately $10-15 depending on lumber used. We ended up using a mix of premium lumber and “furring strip boards” so our cost was slightly higher, but even assuming you used premium pine throughout, I’d imagine the cost per bench still being around $20 or so in lumber. But why a kids bench you ask?
As I mentioned in the reveal for this build earlier this week, my good friend Adrian asked me to help him build a small table for his daughters a couple of months ago. He wanted to make them a play table for coloring, drawing, arts and crafts, etc. We built a small table at the same time I built the craft table for my daughter. The idea was for him to come back the following weekend and we were going to build some benches for the kids as well. As it can happen when you’re an adult, life got in the way and we couldn’t get back together to build them until recently.

Luckily enough, in that timeframe I learned how to use Sketchup. Well, I didn’t “learn” as so much as I fumbled around until things popped up and I ended up with a few different bench designs. I sent him a few to choose from and also asked my wife which design she felt was best. They both picked the same design, so I printed up the plans and away we went. Even better was the fact that Adrian had just purchased his new Ryobi drill set and I recently acquired a new wet/dry vac that I had been dying to use. This would give us both an opportunity to play with our new toys.
I figured this would be a pretty quick and simple build. Apparently Murphy’s Law had other plans in store for us, as we encountered a few minor problems that delayed us quite a bit. I will say that once the kinks were worked out, so to speak, we were able to knock this project out relatively quickly.
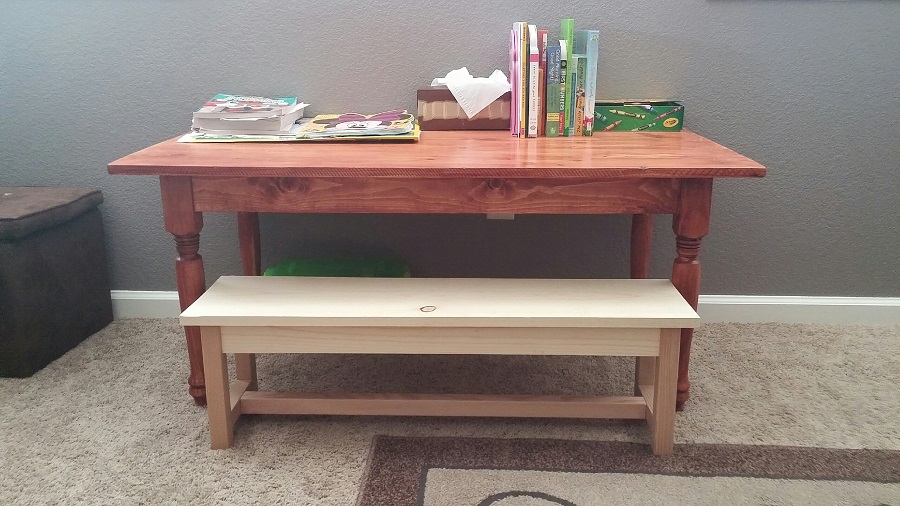
The first issue we ran into is that I designed the benches to fit snuggly next to the table that Adrian and I had built. What I didn’t realize is that Adrian wanted the benches to slide completely under the table so that when not in use, the benches will be easily tucked away. On top of that, I had drawn the benches up too tall. The table we built was shorter than my memory served (which, these days it doesn’t serve much!). Luckily, we hadn’t made any cuts yet and we were able to adjust the width and height of the benches. However, bigger problems were on the horizon, as Adrian had some lumber left over from the table build. “Premium” 1x3s and 2x2s from a local big box chain, these pieces were milled quite thinner than I had planned for. The thickness of the 1x3s were only 5/8” thick, which ended up causing all kinds of problems when we tried to attach them with pocket screws. It may have been me, but even drilling the pocket holes at proper depth for wood size, the wood split when screwing them in to the legs. This happened multiple times, and eventually, we decided it would be better to get new “non-premium” 1x3s. So off Adrian went to get more lumber, leaving me to tinker with other projects! Once we he returned, we once again cut and pocket holed the aprons. Once this was done, we made quick work of the rest of the project. I have enclosed the plans as I originally designed them. They should fit nicely under a table 24” tall by 48” long. Good luck and good building!
Click here to download printable PDF version
THE BUILD:
We started by pre-cutting all the pieces. Typically I don’t do this, but because there were so many similar cuts and the project was pretty straight forward, I figured it’d be easier. We cut everything and then drilled the necessary pocket holes. We separated everything out by leg and started piecing everything together.


I had some leftover trim from a different project that just so happened to be the exact size of the spacers we needed. In order to keep the end aprons flush with the tops of the legs I used my combination square as a straight edge. I repeated this for each step attaching an apron to keep everything in-line, and also help the project from becoming wobbly in later steps. I never realized until now just how much I use my combination square while building as you’ll see below. If you don’t have one, I really recommend picking one (or more) up. Because the bench isn’t that wide and it’s light I didn’t run a vertical pocket hole to attach the legs to the bench seat. The pocket holes in the side aprons should be enough.


Again, my combination square came in handy (what would I do without it?!). I set the depth to 1 ½” and used it to make sure each end stretcher was placed accurately. I repeated this step several times while attaching the stretchers, especially immediately before screwing each end in. The angle to screw the stretcher in to the legs is a bit tricky due to the shortness of the stretcher, and depth it is being attached. The legs kept getting in the way. Just be sure to stay patient and constantly check your depth so you don’t accidentally shift the piece up while trying to attach it.


Once the legs were built, it was time to connect everything with the side aprons, paying special attention to the direction of the pocket holes for attaching the bench top later. Again I used my spacer to keep everything evenly spaced. You’ll notice that the 1x3s in the two pictures are different. This is due to the “premium” lumber splitting and needing to get new “cheapo lumber”- yes that’s a technical term. Look it up. Once both aprons were connected, I turned the project right side up for a moment to ensure that everything was still square and also check for any rocking or wobbling. You’ll notice Adrian is rocking his Giants shirt. We’re both avid sports fans who root for Bay Area teams. Luckily, we both root for the same Bay Area teams (Niners/Giants baby!!!).

We flipped the benches upside down to attach the middle stretcher using clamps to hold the board in place as it was screwed in. You’ll notice Adrian in the background using the combination square to ensure that the stretcher is spaced exactly the same from each end. Because the lumber was slightly thinner then what was in my plans we had to adjust the measurements slightly. The combination square was a huge plus for ensuring accuracy.


After that, all that was left was to attach the bench seat. Yet again, my combination square came in handy! We used it to make sure the seat had the proper overhang on each side. We attached the seat to the aprons with 1 ½” pocket hole screws.


And they’re done!!! Well, sort of. Adrian also purchased a sander and wanted to take them home for final sanding and finishing.


THE PLANS:

Materials (enough to build 1 bench):
- (2) 2x2x8
- (1) 1x3x8
- (1) 1x10x4
- 2″ pocket hole screws
- 1 1/2″ pocket hole screws
- wood glue
- sandpaper
- finishing supplies (stain, paint, etc.)
Tools needed:
- Power Drill
- Miter saw
- clamps
- square
- measuring tape
- pencil
- safety gear (hearing protection, safety glasses, etc.)
Cut List:
- 2- 2×2 @ 5 ½” (side Stretchers)
- 4- 2×2 @ 14” (legs)
- 1- 2×2 @ 37” (middle stretcher)
- 2- 1×3 @ 37” (side aprons)
- 2- 1×3 @ 5 ½” (end aprons)
- 1- 1×10 @ 42” (bench seat)
The Project:
STEP 1: |
|
|
|
STEP 2: |
|
|
|
STEP 3: |
|
| Make second set of legs by repeating step 1. | |
STEP 4:  |
|
|
|
STEP 5: |
|
|
|
STEP 6: |
|
| Cut bench seat from 1×10” stock @ 42”. Seat should over hand ends by 1” and the sides (long edge) by ½”. Pocket screw with 1 ½” pocket screws. Glue is optional. I didn’t glue the top to allow for expansion of seat in different climates.FINISHING STEPS:All that’s left at this point is to fill the holes with wood filler (if desired) and sand the project. Be sure to vacuum the sawdust off the project, and wipe down with soft, damp cloth. Add stain, paint or both depending on your desired look. Don’t forget to protect your project with a few coats of polyurethane. |

Looks great! I love the stain. What color is it?
LikeLike
Thank you Ashley! I believe the stain is “traditional cherry” from Rustoleum. My buddy stained it at his house and at the moment I can’t remember what he bought.
LikeLike